I put these step-by-step instructions together for some friends of mine that have a website on how to add an image to a WordPress post or page. I know how frustrating it can be to just add a simple image so hopefully with this tutorial it will make it a lot easier for you.
To begin, make sure you are logged into your WordPress Dashboard and are on the post or page that you want to add an image to.
 To add an image to a post or page within WordPress simply place your cursor where you want to insert the photo and press Add Media (located at the top of the page you are editing. (Note: if you forget to place the cursor where you want the image you can always delete it and start over but it’s nice to have the image in the place you would like it from the beginning) 🙂

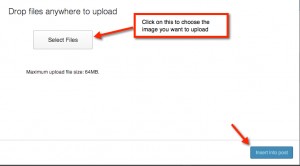
 After you click on Add Media another box will pop up. Click on Select Files, choose the image you want to add then click Insert into Post.
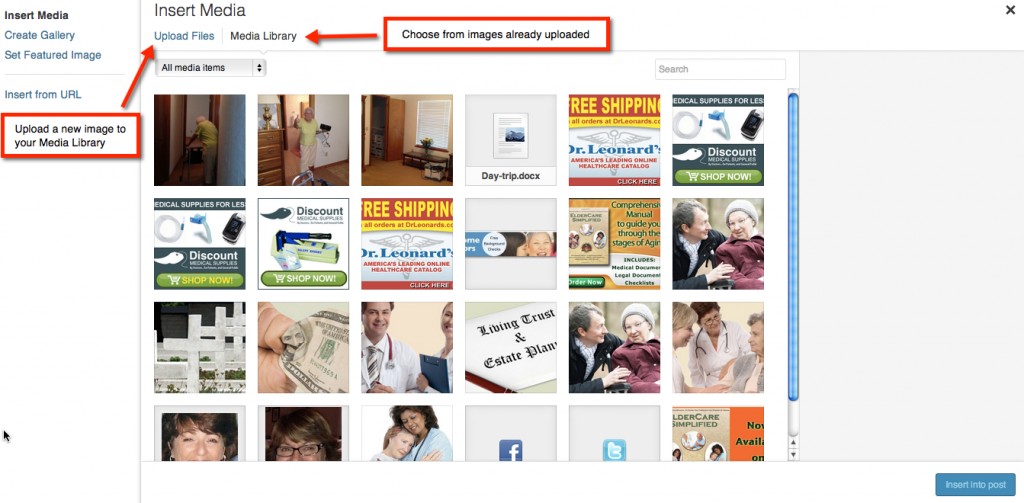
 From here you can either choose to upload a new image or choose from an image that you have already uploaded to the Media Library. For this tutorial we are going to add a new image. Click on Upload Files.
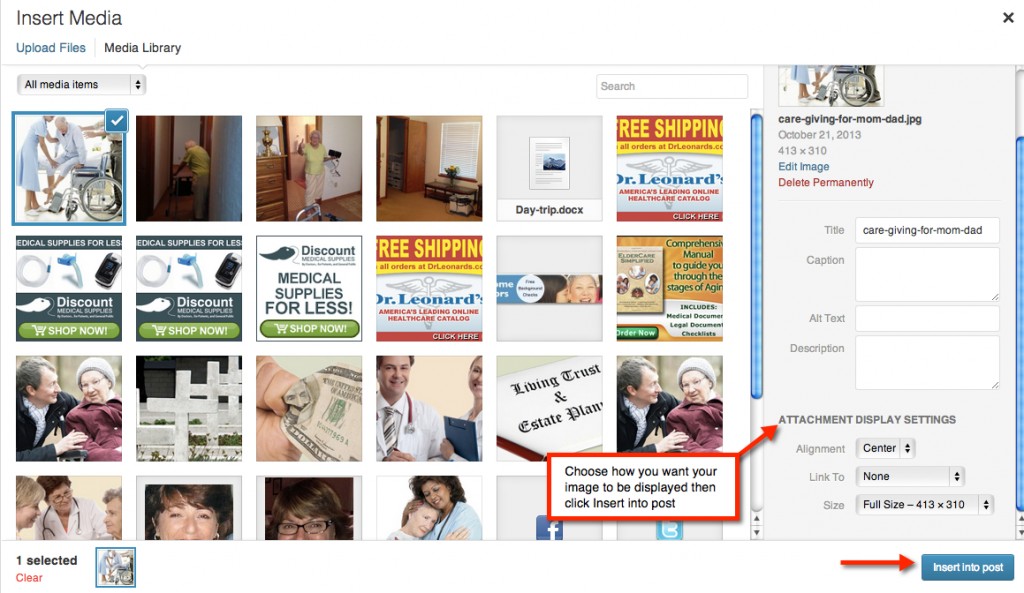
 Once the image is uploaded you now tell WordPress where/how you want the image to be displayed. Do you want it to the left, right or center? Will this image link to another page and what size would you like the image to be? You can answer all these questions in the box that appears to the right after you have uploaded the image.
There you have it! You have just added an image to your post. What if it’s not positioned where you want it or the size is not right?
No Worries!!!
How to Edit an Image that is already on a post or page
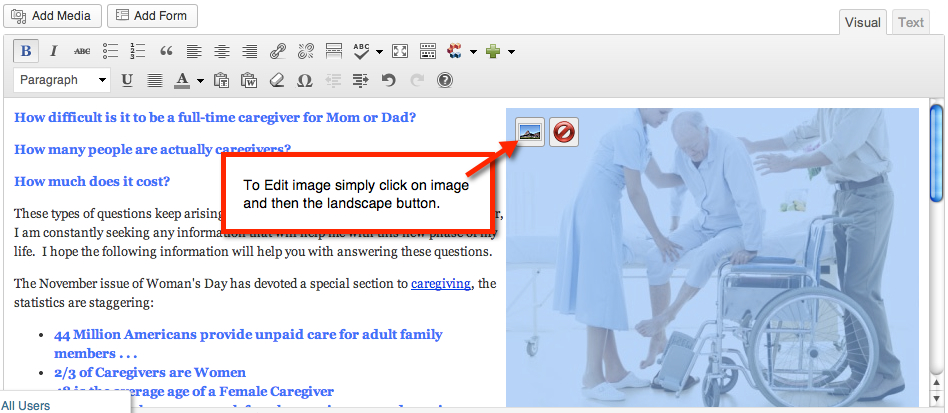
- Now that the image is inserted into your post you can see what it will look like when a user views it. Let’s say that you are not to happy with the size and position. Simply click on the image and two boxes will appear at the top of the image. Click on the little mountain icon…
- Another window will pop-up. Under the Edit Image tab you have the ability to make the image smaller (Note: you can’t make an image bigger only smaller). You can change the location of the image as far as having it to the left or right of words or in the center of the page. If you choose to have the image link to another page on your site or to another site you can insert the URL in the Link URL box.
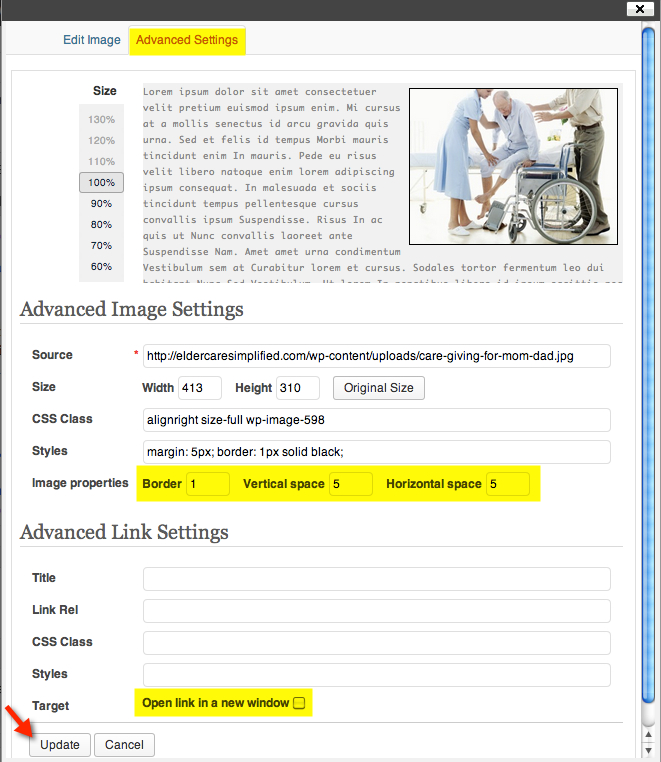
- The second tab is for Advanced Settings and you can make the image small here also but you also have the ability to put some spacing between the image and verbiage. To do so simply put in a number where it says Vertical/Horizontal space. I usually go with a #3 or #5 and then if you want a border around the image put a number in the box that says Border. Keep in mind the higher the number the larger the border will be around the image.
If you do choose to link your photo to another page outside of your site I HIGHLY recommend you click on the box next to Open Link in New Window. What this will do is if your visitor clicks on the image and is taken to a new site it opens it in a new window so if they close that site your site is still there in the back ground.
There you have it. Wasn’t so bad was it?
Are there some other things in WordPress that have you stumped? Let me know and I’ll be more than happy to write up a step-by-step tutorial on how to do it.









2 Responses
Hi Audrey,
I am so glad I came across your blog. I have just started using WordPress and your step-by-step guide is exactly what I need. I have bookmarked the page and will follow your steps. Thank you for your offer of help with other WordPress topics. I may well take you up on that.
With many thanks,
Isabella
Isabella, I’m so glad these instructions were helpful. Thank you so much for stopping by and commenting, that means so much to me. Please do take me up on the offer. If there is anything I can help you with just let me know. 🙂
~ Audrey